Bike Rack Build 3rd and Final – Install

Oh sweet satisfaction. Finally I get to wrap this project up. Things went smoothly, but of course there were some last minute changes to get everything nice and secure.

The first notable change, which I really should have expected, was a serious case of shrinkage. I bought the green doug fir lumber about 3 weeks prior to the install date. Over those week, while carving and staining, the wood shrank noticeably. When I carved out the recesses for the lap joint the two pieces fit together snugly, requiring some gentle tapping to get the pieces set into each other. By the time I was ready to install, the joint had a quarter inch of clearance on all sides.

I was a little disappointed by this at first,  but it was really a blessing in disguise. The shrinkage allowed a little bit of wiggle room to make sure everything got set up nice and level. 

Continue reading Bike Rack Build 3rd and Final – Install

Bike Rack Build 2 – Finishing

Sanding, sanding, sanding, sanding. So much sanding to take these rough cuts of dimensional lumber down to a finish to be proud of. Moderately proud of, anyways. I’m not going for a high gloss, pristine mirror finish. I’ll be sticking to some simple poly stain to compliment the colors of the ceiling beams in my apartment. A natural color for the drop, and a dark cross beam.

The green doug fir 2x’s that I bought were definitely rough. I started off with my random orbital sander with 80 grit sand paper. After a thorough twice-over with that I moved to 120 grit, then to 220. At this point the wood was nice and smooth, but I was done for the day. The stain would have to wait.

The orbital sander makes quick work of the sanding, but isn’t the best choice when applying the stain. As a last step before the stain I used a sanding block with 240 grit sand paper and went over everything one more time, sanding with the direction of the grain. I doubt I got all of the swirls from the orbital sander out of the wood, but I didn’t notice many by the time I was done.

Continue reading Bike Rack Build 2 – Finishing

Bike Rack Build – Construction

Content with the CAD model I had drawn up I set to work on actually making it. Step one was to find the materials. I was hoping to make this out of red cedar, like I used on my guitar rack, but Lowe’s didn’t carry any 2×12 red cedar. The only thing available in 2×12 was green douglas fir.

Fortunately, this is also about the cheapest option in the store. I picked out an 8 foot length of 2×12 and 2×6, doing my best to find consistent grain and minimal knots, and headed to the shop.

The first step is getting an overall picture of how much wood would need to be trimmed off. I only had about 8″ of extra length on the 2×6, so I didn’t have much choice laying out the hole patterns. However, I did still have some options with orientation and used the opportunity to cut off the worst of the ends.

Continue reading Bike Rack Build – Construction

Pickup Winder DC Motor Control Prototyping

I Have a Dream

…of one day playing a show with all gear that I made. Guitar, amp, pedals, all of it made my me. I don’t plan to all the way, I’ll be buying the potentiometers and caps and probably most of the hardware. I do, however, plan to make the pickups.

I’m also going to make the machine to wind the pickups. That’s what I’ve been poking at lately. As of now I have a very basic PWM based speed control for a brushed DC motor. I scavenged the motor from an air bed pump I got at Goodwill. It was a couple bucks and has a good basis for everything I’ll need to get up and running.

Continue reading Pickup Winder DC Motor Control Prototyping

Bike Rack Design

My new apartment has considerably more square footage than my previous place and I can finally bring my bikes inside out of the elements. This is great considering the added moisture in the PNW. However, we need a way to keep them neat and out of the way but still accessible. They can’t stay leaned up against the wall by the door, anymore.

I picked up a few bike racks from Amazon to mount on the wall. However, as has been an issue in a few other posts, the metal stud drywall setup in the new apartment doesn’t hold up to any sort of load. So after quickly installing the bike in drywall and seeing the drywall anchors slowly pull out of the wall I knew I’d have to take a similar approach I took on my guitar rack

Step one is to nail down the design. I took some rough measurements and made a couple quick sketches until I could take it to Solidworks. 

Continue reading Bike Rack Design

Adventures in Vinyl (aka “Put a Bird On It!”)

DIY Christmas Presents

We decided to do some crafty, homemade presents for my girlfriend’s family for Christmas. Having recently moved to Portland, we wanted to make a present that had a feel of our new digs. What we came up with was very hip mason jar with stuffed candy and treats. We would spice up the jars by getting crafty and etching everyone’s favorite bird into the glass jar.

We created vinyl bird silhouettes stencils to etch the patterns into the side of the mason jars. My girlfriend created the artwork in Illustrator and I cut the stencils on a vinyl cutter I had access to at a workshop I use. We would use a chemical etching solution to create a frosted pattern in the clear glass.

Here Come the Birds

Step one was finding out everyone’s favorite bird. We didn’t even think most people would have an answer, but some of the responses had clearly been thought about for a while. For example one cousin’s choice was the titanis walleri, and his fiance’s was a shoebill stork. After a few days we had a list of birds to work with.

Continue reading Adventures in Vinyl (aka “Put a Bird On It!”)

Prototype Boost Built, Testing to Come

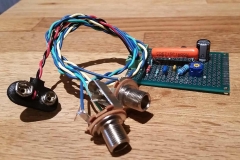
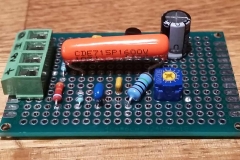
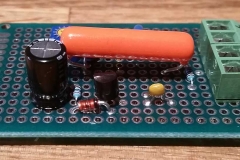
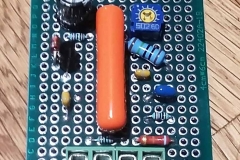
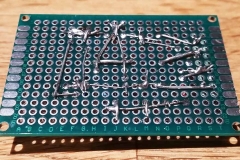
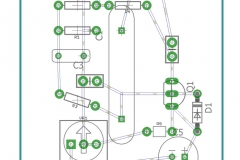
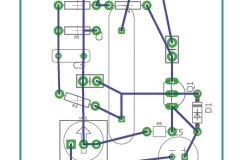
Building on my work from a couple weeks ago, I put solder to iron and built up a first prototype of the boost circuit for my buddy’s 8-bit fuzz pedal. Th EagleCAD board layout I made earlier was almost exactly what I needed. However, because I was fumbling my way through the software I didn’t have the correct packages selected for all of the devices.

I tweaked the layout with the actual components I ordered from Digikey a few weeks ago. The biggest curveball was that I ordered some gigantic orange 1000pF caps. I just wasn’t looking that closely at packages when I ordered, but I had plenty of board to work with.

I hooked up some 1/4″ jacks to the I/O terminals and connected a 9V. I tested with my Epiphone Les Paul into a Focusrite Scarlet interface. The signal came through clear and clean, and there was no audible (to me at least) distortion as I rolled through the gain range. 

I’ll take the board over to check out the performance characteristics on an oscilloscope soon. Then, I’ll start looking to shrink the footprint of the board as much as possible so I can cram it inside an existing pedal.

Garden Tarp

I recently moved up to Portland and have a killer south facing patio that is great for gardening. At least it was it the summer and fall. Now that winter has set in and the temperature’s dropped below freezing and we’ve had snow followed by more snow followed by more snow, gardening is getting a little bit tougher. 

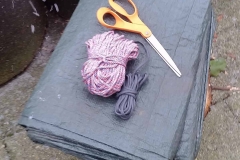
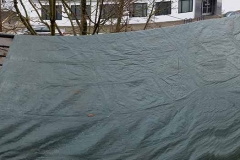
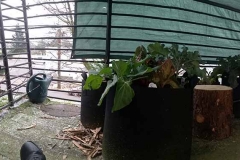
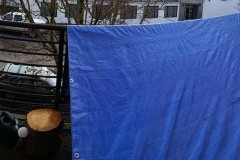
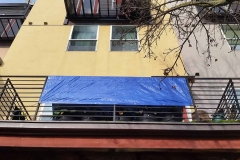
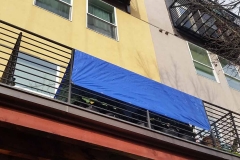
I knew that the snow would pretty much destroy any crops I had going. To help give them a fighting chance I set up a nice little tent. Using an 8’x10′ plastic tarp and some polyester string I set to work setting up camp on my patio.

The tarp is draped over the railing to form the ridgeline and the corners are tied out to spots on the railing with tautline hitch knots. I originally tied the string to the tarp with bowline knots, but later changed them out for some caribiners to make it easier to set up and take down.

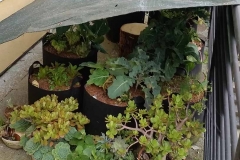
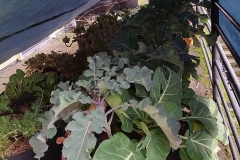
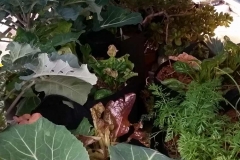
 The tarp worked pretty well. My collards, swiss chard, and broccoli are all doing well. It did not, however, help protect my succulents against the cold and I lost a few old and sentimental jades. I’m sad to lose them, but I guess lesson learned. Succulents come inside during the winter from now on.

Hopefully by next winter I’ll be able to get a more enclosed greenhouse set up to help keep the cold to a minimum.

Found Supplies: Peugeot PR10 Frameset

Recently I was dropping my girlfriend off at work in downtown Portland when I spotted something under an underpass. I circled around after dropping her off and parked to check it out. There was a shopping cart with a couple of bike frames and tires, seemingly abandoned. I looked around the area, spent a few minutes checking out what was in the cart, and no one seemed to have any interest in the bikes.

I am always looking for things like this. A cache of goods might have a treasure in it if you’re looking for the right thing. What caught my eye in this cart was a white Peugeot road bike frame. I spent a few minutes looking it over, and it was in rough shape. 

Remembering that most older Peugeot frames are pretty heavy, cheap steel I almost got back in my car and left. I didn’t need another low priority, low value project. But as I was leaving a sticker on the chrome fork caught my eye. It said “Reynolds 501”. The fork, at least, was worth the trouble.

Continue reading Found Supplies: Peugeot PR10 Frameset

Planning and Prototyping a Mosfet Boost Circuit

Long ago I promised my friend Nick a mod for a guitar pedal of his. His 8-bit fuzz pedal caused a volume drop that he couldn’t overcome by tweaking the settings, and he didn’t want to put a boost after because he would have to hit two pedals every time he wanted to switch to his fuzz. I had been looking at making a couple of different boost circuits and offered to put one in his pedal.

Now, some years later, I’m actually putting some effort into the project. The circuit I chose is the Mosfet Booster pedal from AMZ .  The circuit was simple and would make for a very transparent gain stage. The idea is to make a small add-on board for his current pedal and wire the boost in line before the output jack.

I had seen a Hack-a-Day series about creating PCB’s in a number of different software, in particular a walk-through of using Eagle CAD. I’ve seen so many mentions of Eagle CAD over the years, but never used it. This simple circuit would make a good intro to the program.

Continue reading Planning and Prototyping a Mosfet Boost Circuit