DIY Christmas Presents
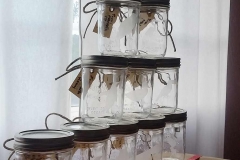
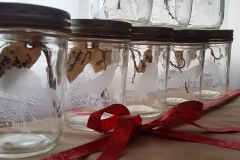
We decided to do some crafty, homemade presents for my girlfriend’s family for Christmas. Having recently moved to Portland, we wanted to make a present that had a feel of our new digs. What we came up with was very hip mason jar with stuffed candy and treats. We would spice up the jars by getting crafty and etching everyone’s favorite bird into the glass jar.
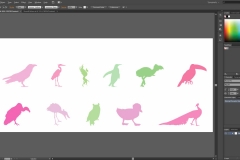
We created vinyl bird silhouettes stencils to etch the patterns into the side of the mason jars. My girlfriend created the artwork in Illustrator and I cut the stencils on a vinyl cutter I had access to at a workshop I use. We would use a chemical etching solution to create a frosted pattern in the clear glass.
Here Come the Birds
Step one was finding out everyone’s favorite bird. We didn’t even think most people would have an answer, but some of the responses had clearly been thought about for a while. For example one cousin’s choice was the titanis walleri, and his fiance’s was a shoebill stork. After a few days we had a list of birds to work with.
We wanted each jar to be specific to the person, so we made sure not so duplicate birds for people. We found that peacocks and ducks are popular birds. My girlfriend, Antoinette, started work on the vector art for the project by gathering reference pictures of each bird. She took the reference pictures into Illustrator and traced each bird.
After a few days we had a full set of bird vector art to work with. The project would now be passed back to me to take over to the makerspace and learn how to use a vinyl cutter.
I Can Figure This Out…
I’m still pretty new to the makerspace and haven’t had a chance to get trained on most of the equipment there. The vinyl cutter was one of the pieces that I had not been introduced to. I did know where it was and there was plenty of scrap material to practice on. With no written instructions I started poking and prodding to try to feel my way through it.
The cutter is controlled by an old laptop that lives next to the cutter. When I powered it on it was pretty clear there were few uses for the machine outside of the vinyl cutter. I opened Inkscape, one of the handful of icons on the desktop, and found an extension called InkCut. A little Googling brought up plenty of information to confirm that this is the set of software that I would need to use for the cutter.
The next step was to see what kind of information I could find on the cutter itself. I was able to find a manual for a similar model in the same product line. The document included feed setup and notes on setting up the cutting pressure and origin. The model in front of me had a very similar setup and was loaded up with scrap vinyl after a minute.
Before connecting to the laptop I got a feel for the menus on the cutter by browsing the menus. I found a test pattern command and was able to successfully cut a test pattern on the first try, more or less. The pattern was scored into the vinyl, but the cuts were not deep enough.
Some small adjustments adjustment to the cutting pressure should take care of it. I also had to adjust the origin for the plotter to offset the pattern to some fresh vinyl. A couple iterations of small adjustments to pressure and I had a pretty good feel of what would cut through the vinyl without going into the backing sheet.
Controlling the Cutter
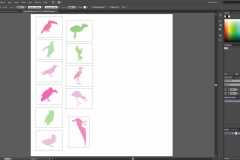
Inkscape works with an open source version of the Illustrator files we had been using up to this point. Fortunately we were able to export the required SVG file from Illustrator. The original artwork had each bird stored as a separate file. To make the cutting easier, I combined them into a single pattern with ample space between birds. The interstitial space is what we’ll be using as stencils for the etching process.
I read a couple of walk-throughs of using InkCut that pretty much answered all of my questions between them. To keep it simple I did the first couple of cuts testing a single bird on a small scale. The first cut went pretty smoothly. The only issue was that the bird outline was not completely connected. I reduced the problem in later cuts, but still need to dial it in. Since the single bird was a success, I re-indexed the cutter and sent the whole collection to cutter and had a sheet of bird stencils to take home.
Etch…
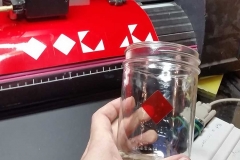
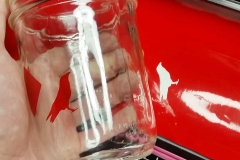
To prep the stencils for transfer we needed to remove the positive version of the image. As a result my water bottle is now covered in red vinyl birds. Once the positives were removed, we needed to add a backing sheet to the vinyl to keep it from stretching.
We used blue painters tape and added enough overlapping rows to cover all of the vinyl. This way, when we remove the backing from the adhesive side of the paper, the masking tape will help keep the shape of the vinyl consistent. Once applied, we peel off the backing tape and are left with a transparent red bird negative on the jar. We repeated this process for each bird. We found we could use the tape repeatedly and slowly made our way through the batch.
We used Armour Etch to transfer the patterns to the glass. It specifies a 5 minute working time before rinsing it off. After a successful test jar, we applied to cream to all of the bottle, working down the line. By the time I finished applying the the cream, it was time to rinse the first jar.
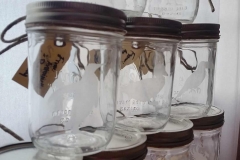
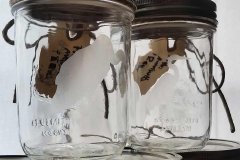
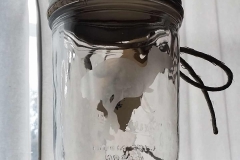
The etching came out really clear. The vinyl stencils really helped pull out some crisp detail that I considered a big success. Now we just had to do some final packaging before presenting them to everyone.
Artisinal Knots and Locally Sourced Treats
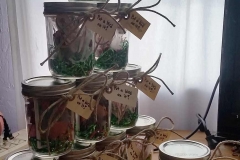
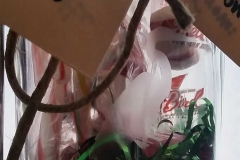
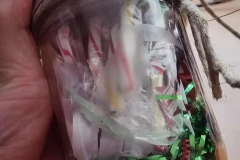
We picked up a ton of treats from the local dollar store, some magnets from Powell’s for a little bit more Portland, and some special treats for everyone and started packing each of the jars. My girlfriend really took the lead to finalize the contents. The only thing she needed from me was a way to attach the To/From tag to the jars.
With one last chance to make a Portlandia joke, we went with some lovely artisinal knots in hemp twine. The tags read “Put a bird on it!“.
Unfortunately the response was a little underwhelming. Though we thought they were a hilarious gift to highlight our recent move, most of her cousins weren’t very familiar with Portlandia. Fortunately they all appreciated the craftsmanship and effort we put in. It was a good time watching them discovered their favorite bird on the side of each jar.


