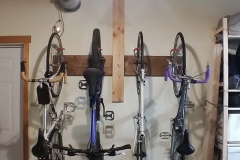
Oh sweet satisfaction. Finally I get to wrap this project up. Things went smoothly, but of course there were some last minute changes to get everything nice and secure.
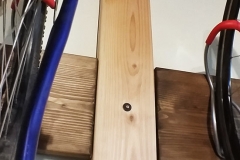
The first notable change, which I really should have expected, was a serious case of shrinkage. I bought the green doug fir lumber about 3 weeks prior to the install date. Over those week, while carving and staining, the wood shrank noticeably. When I carved out the recesses for the lap joint the two pieces fit together snugly, requiring some gentle tapping to get the pieces set into each other. By the time I was ready to install, the joint had a quarter inch of clearance on all sides.
I was a little disappointed by this at first, but it was really a blessing in disguise. The shrinkage allowed a little bit of wiggle room to make sure everything got set up nice and level.
There was a gap at the top between the face of the beam and the drywall, but I forgot to cut some spacers while in the shop. I started going through my junk bins and came across the wooden mounting brackets from some Hercules guitar mounts that are now installed on my guitar rack. I don’t know why I’ve hung onto them for so many years, but they were just the right size to use as spacers for this project. I guess that’s the whole point of the junk bin, though.
The wooden spacers were taped to the top and used as guides to to drill through for two screws each. However, I was using a handheld drill and didn’t manage to keep the holes nice and parallel, so when I ran screws through for the first spacer they completely missed the holes in the spacers I used as guides. To fix it I moved the spacer to the back of the wood and drilled to the front. Fortunately, since I’m using some cabinet screws with large heads, tear out from the drill wasn’t too big a concern. Plus, these screws would be about 12 feet off the floor and minimally noticeable.
I used two of these spacers, one horizontal at the top, and one vertical a couple inches below. The first screw I put through to the beam was the top screw of the vertical spacer. I didn’t tighten it down and used it as a pivot point to try to get the beam as plumb as possible. I put the other three screws in, again loosely, to hold the piece steady while I positioned the cross piece.
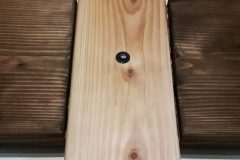
With screws still pretty loose I was able to pull the bottom of the beam out and slide the cross beam up until the lap joint was holding it up. Of course, with the shrinkage the center hole for the joint no longer met up. I leveled the cross beam and drilled a new center hole. Then, while holding the cross beam to keep it steady, I drilled a couple pilot holes on each end through to the drywall.
I used the pilot holes to screw in some heavy duty drywall anchors. these anchors shouldn’t be supporting too much weight, that’s handled by the cabinet screws going into the ceiling beams. These anchors are mainly to keep the the bottom nice and flush against the wall and keep it from swinging or shifting.
I again had to loosen everything up and take all but one screw out of the top to allow it to rotate a little. I screw these anchors in by hand because my drill doesn’t have a variable chuck and I don’t want to drill the anchors too far into the drywall. Then I swung the beam back into place and got the screw into anchors before tightening everything down.
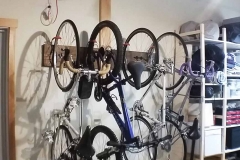
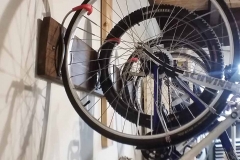
With the beams securely mounted to the wall all I had left was to screw the bike hangers into place. I went one by one on these, hanging a bike up and sticking the lower cradle to the wall with the double sided tape that comes ready to go.
There’s nothing like the satisfaction of seeing a project come to life. My rec room now feels so much more spacious and clean and I can get to any of our bikes without any difficulty. I even have space to hang up my project bike while I slowly assemble parts.


