Category Archives: Woodworking

Bike Rack Build 3rd and Final – Install

Oh sweet satisfaction. Finally I get to wrap this project up. Things went smoothly, but of course there were some last minute changes to get everything nice and secure.

The first notable change, which I really should have expected, was a serious case of shrinkage. I bought the green doug fir lumber about 3 weeks prior to the install date. Over those week, while carving and staining, the wood shrank noticeably. When I carved out the recesses for the lap joint the two pieces fit together snugly, requiring some gentle tapping to get the pieces set into each other. By the time I was ready to install, the joint had a quarter inch of clearance on all sides.

I was a little disappointed by this at first,  but it was really a blessing in disguise. The shrinkage allowed a little bit of wiggle room to make sure everything got set up nice and level. 

Continue reading Bike Rack Build 3rd and Final – Install

Bike Rack Build 2 – Finishing

Sanding, sanding, sanding, sanding. So much sanding to take these rough cuts of dimensional lumber down to a finish to be proud of. Moderately proud of, anyways. I’m not going for a high gloss, pristine mirror finish. I’ll be sticking to some simple poly stain to compliment the colors of the ceiling beams in my apartment. A natural color for the drop, and a dark cross beam.

The green doug fir 2x’s that I bought were definitely rough. I started off with my random orbital sander with 80 grit sand paper. After a thorough twice-over with that I moved to 120 grit, then to 220. At this point the wood was nice and smooth, but I was done for the day. The stain would have to wait.

The orbital sander makes quick work of the sanding, but isn’t the best choice when applying the stain. As a last step before the stain I used a sanding block with 240 grit sand paper and went over everything one more time, sanding with the direction of the grain. I doubt I got all of the swirls from the orbital sander out of the wood, but I didn’t notice many by the time I was done.

Continue reading Bike Rack Build 2 – Finishing

Bike Rack Build – Construction

Content with the CAD model I had drawn up I set to work on actually making it. Step one was to find the materials. I was hoping to make this out of red cedar, like I used on my guitar rack, but Lowe’s didn’t carry any 2×12 red cedar. The only thing available in 2×12 was green douglas fir.

Fortunately, this is also about the cheapest option in the store. I picked out an 8 foot length of 2×12 and 2×6, doing my best to find consistent grain and minimal knots, and headed to the shop.

The first step is getting an overall picture of how much wood would need to be trimmed off. I only had about 8″ of extra length on the 2×6, so I didn’t have much choice laying out the hole patterns. However, I did still have some options with orientation and used the opportunity to cut off the worst of the ends.

Continue reading Bike Rack Build – Construction

Bike Rack Design

My new apartment has considerably more square footage than my previous place and I can finally bring my bikes inside out of the elements. This is great considering the added moisture in the PNW. However, we need a way to keep them neat and out of the way but still accessible. They can’t stay leaned up against the wall by the door, anymore.

I picked up a few bike racks from Amazon to mount on the wall. However, as has been an issue in a few other posts, the metal stud drywall setup in the new apartment doesn’t hold up to any sort of load. So after quickly installing the bike in drywall and seeing the drywall anchors slowly pull out of the wall I knew I’d have to take a similar approach I took on my guitar rack

Step one is to nail down the design. I took some rough measurements and made a couple quick sketches until I could take it to Solidworks. 

Continue reading Bike Rack Design

Bassman Amp Design – CAD Model

Motivation

The recent find of some good looking 3/4″ plywood was the swift kick I needed to get the ball rolling on a long dormant project. A few years ago I started down the road of building a Fender Bassman clone based on the 5F6 circuit. I was going to do this remotely with a friend. He would handle some electronics analysis for some mods we had in mind, and I would guide the mod selection and build the cabinet. I even went so far as to buy a chassis.

Unfortunately the project never went much further and the chassis sat in the corner of my room for a long time. Then, looking for a CAD project to practice on, I picked it up and got a sheet metal part about 80% done. It was a full box with one of the three faces completed with punched holes.

Getting Started

Knowing I had the chassis model nearly done I started to put together a model of the plywood cabinet. I’ve never had much luck modeling larger assemblies from the ground up and wanted to try something new. I had heard the term “top-down” in relation to CAD models and it seemed like the way to go.

Step one was to do a little research on Fender cabinets similar to what I had in mind. I wanted to skip the 4×10 configuration the Bassman is known for in favor of a much more portable and apartment friendly 1×12 combo. I used a few pictures and drawings of the 4×10 configuration to get an idea for the parts involved, then changed the baffle design and size to fit a single 12″ speaker.

Continue reading Bassman Amp Design – CAD Model

Carving Net Making Tools

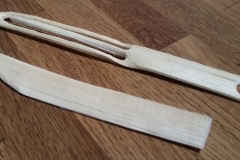
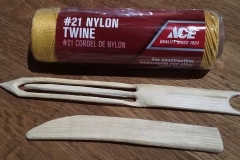
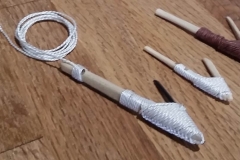
With my recent haul of wood scraps to carve I started looking for another small project to work on. While looking around I came across a Ray Mears video showing how to make a sort of shuttle or bobbin to use in net making. In other words, this is a project with an immediate follow-up, a perfect choice.

I recently fixed a chipped edge on a hatchet recently and was still itching to put it to use. I grabbed the leftover limb from the letter opener I carved and went to town. The first split left two pretty unequal halves, so I split the larger again. The piece I ened up using was the smaller of the first two halved.

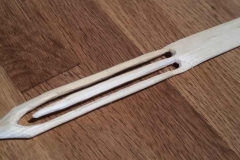
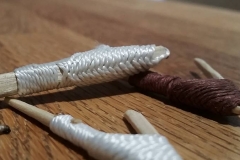
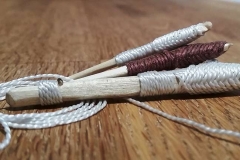
Step one was to clean up the split edge and try to get a relatively flat surface to work with. The tool I was carving had two sections, a straight section with two “horns” at the end, and a section with a needle carved out of the center that came to a point.

There were several knots in the limb to work around. I found the longest knot free section to use as the more intricate side of the tool with the carved out need. The base of this need would be just ahead of a knot, and the “handle” would extend on the other side to the next knot.

This project was definitely a step up from my usual projects as it incorporated a free floating inset piece. Working on something so delicate definitely encouraged me to go slow.

After getting the net spool together I used another small scrap to make guide. The guide will ensure equal spacing when it comes time to test this out and make a net. It is essentially a plank of wood with a somewhat airfoil shape.

Next up is testing these out.

Spoon Carving

After finishing my first couple of wood carving projects I was looking for the next one. I had seen a few spoon carving DIY posts about carving spoons so I decided to try it out. I also happened to need some new big kitchen spoons for cooking.

After spending a minute on Amazon I opted for a two sided hook knife from Morakniv. I chose this specifically because both sides of the blade have an edge, and since this is my first and only dedicated carving knife, I wanted to make sure it would do as much as it could.

The next night while eating dinner my girlfriend got an invitation to, of all things, a spoon carving party. The hosts are avid outdoors-people and one is particularly into wood carving. Of course we agreed to go, and of course I told everyone about how crazy the timing was for me. Unfortunately my knife didn’t come in time for the party, it was waiting for me when I got home, so I used some of his knives during the party.

The idea of the party was that before anyone would eat, they would carve a spoon. Fortunately for the guests, they didn’t hold us to that. We may not have eaten until midnight if they had.

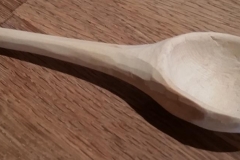
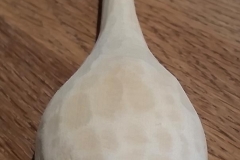
We got to work pretty much right as we walked in. I grabbed what turned out to be a piece of cedar to carve, which was fortunate because it was one of the easier pieces to carve. In fact, I was the only person, save for Luke the master carver and host, to finish a spoon by dinner.

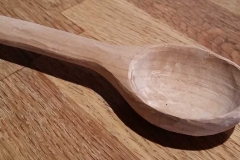
Seeing my spoon while we ate, everyone who had at that point given up on carving decided that they wanted to finish. After eating we all had a second go at carving. I picked up a second piece of mystery wood and starting working. This piece is darker and noticeably harder than the cedar. I got a good way through, but did not finish that night. Fortunately I had to tools to finish it at home.

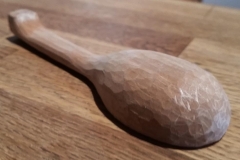
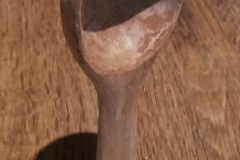
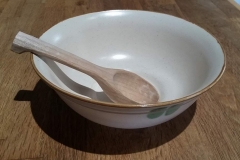
Over the next week I would put a little bit of work in at a time while watching TV. The result is a much sturdier, but also much more refined spoon. It looks like it will be a really good soup/ramen spoon.

I did a quick sanding on the cedar spoon, which gave a cool dimpled pattern by only subtly breaking the edged of each cut. For the darker spoon I will sand out the inner bowl, but leave the hand carved finish for the rest. They will both get some mineral oil to seal the wood, then they are ready to go.

Found Supplies: Russian Birch Plywood

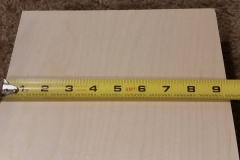
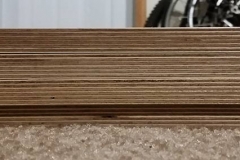
Perusing the Craigslist free section has turned up a few good finds for me. This week it provided me some nice 3/4″ Russian Birch plywood. I was able to pick up four pieces of plywood, each roughly 9″ x 80″.

I’ve had a few projects kicking around in my head that requires plywood, but since this looks like some nice wood I’m thinking it may end up a a cabinet for a Fender Bassman chassis I’ve had for a while.

I guess it’s time to start looking into amplifier cab designs again and get an idea for dimensions…

Carving a Letter Opener

As I near 30 and make some serious changes in my life I’m looking for things that I have had a continued appreciation for. One of those things is wood working. I spent a lot of time playing with bows and arrows as a kid, then building skateboarding ramps and larger plywood projects as a teen. I’ve taken on a few projects in the years and I’m working on wood carving, which I haven’t done much since I was a kid with a  pocket knife.

I’ve picked up right where I left off, sharpening some pocket knives and going to work on some tree branches. During a trip to Ace to pick up some fasteners for my guitar rack I noticed some tree trimmings by their dumpster. I grabbed three branches. One was about an inch and a half in diameter and two feet long. The other two were about four inches in diameter, the shorter one about eighteen inches, the long one about two and a half feet.

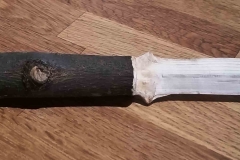
My first project was inspired by a whittling book I found at Powell’s. It showed some intro projects and among them was a letter opener. I picked a good spot on the thinnest branch and found a section with knots pretty evenly spaced on opposite sides of the branch. I decided that would make for an interesting pommel and started thinning what would become the blade.

Taking the blade down reminded me what I enjoyed so much about carving wood. The way the solid wood peels away in delicate flakes and strips. The way the wood is slowly peeled back to expose each new layer, and the way the grain lines create a sort of topographical map of the carving.

Before too long I had slowly worked my way down to a relatively flat section about 1/4″ thick. I started shaping the wood and remembered something that always plagued my spears and arrows from childhood; the center wood was soft and inconsistent the surrounding wood. As I shaped the blade I needed to be very careful to minimize the effect of that soft wood on my blade shape. I couldn’t eliminate it completely and the blade still shows a slight “chip”, but overall I’m pretty happy with the shape.

I sawed the knife off the longer limb with a pruning saw and called it complete. I had considered removing the bark or carving the handle, but have decided to leave the natural look and look ahead to future projects.

Carving Wooden Hooks

Another Ray Mears inspired whittling project that I have taken on recently. Using some of the scraps from my recent letter opener project I carved and tied some hooks.

There’s not much to say about these guys. I used knot free sections that had split off during other work. I cleaned them up and carved them to shape.

The first hook I carved was pretty large and I used a cut off finishing nail to form the point. I tied this on with the inner strands from some 550 paracord.

I carved a few more small hooks, using small wooden spikes for the points. I had wrapped one with hemp cord as well, but when pulling the tag end through the windings on the shaft I caught the hook and broke it.